Step 1
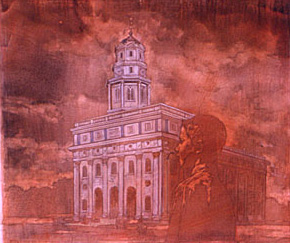
After sketches have been approved and research and reference gathered, I complete a line drawing with pencil on a Sarasota double-primell linen.
The drawing is important to show composition of the picture as well as the seperation between light and shadow.

Figure 1: Line drawing
Step 2
The line drawing is spray-fixed with Krylon Workable Fix. A monochromatic glaze of thinned acrylic is then washed over the drawing to create an overall color scheme and set the tone for the illustration.

Figure 1: Monochromatic glaze
Step 3
The acrylic wash is insoluable in water so additional washes of opaque watercolor can be applied without disturbing the surface underneath.
The watercolor washes are applied thin enough that the drawing still shows through. The subsequent washes are soluable in water so lighter tones can be lifted out of the darker tones.

Figure 1: Opaque watercolor applied
Step 4
The surface at this point remains flexible and additional washes continue to be applied and rubbed out with a variety of brushes.
Also, at this point in the illustration, opaque watercolor is added to the temple surface and detail is achieved quite quickly (Figure 1).

Figure 1: Opaque watercolor added
To create darker darks and smoother gradiation of tones, I switch to oil paint with a liquin medium (Figure 2). The oil is used both opaquely and transparently.

Figure 2: Oil paint with a liquin medium
Step 5
By this point, the illustration is nearing completion. Details continue to be added and attention is spent on color intensity and edge quality.
Figure 1: Details added
Step 6
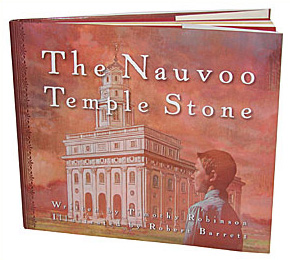
Here is the printed illustration. The placement of type was planned from the beginning and the tone of the illustration allows the type to be easily read as it is reversed out of darker tones.

Figure 1: Final illustration with text applied

Figure 2: Printed illustration on dust cover


